


Come disattivare il servizio Antimalware
Microsoft Defender è il software di protezione contro il malware integrato in Windows, ma molti si chiedono come disattivare l’Antimalware Service Executable.
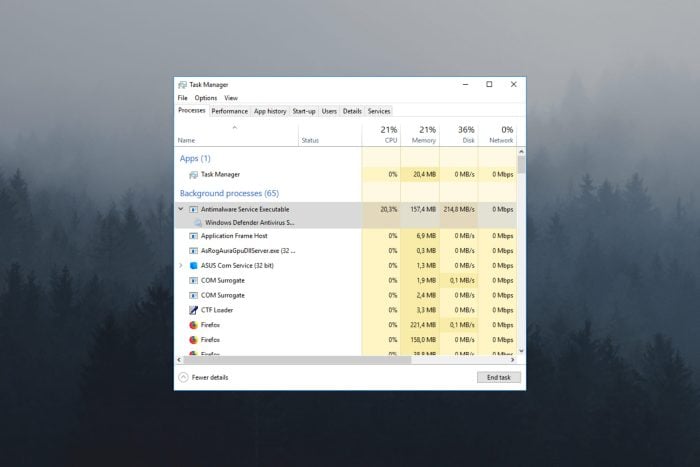
L’Antimalware Service Executable, MsMpEng.exe, continua a funzionare anche dopo che gli utenti hanno rimosso gli strumenti antivirus di Microsoft, il che porta spesso a un elevato utilizzo della CPU.
Posso disattivare Antimalware Service Executable? Se non installi alcun software antivirus aggiuntivo, Windows Defender è l’unico che proteggerà il computer da malware. Quindi dovresti disattivare il servizio se provoca problemi, ma acquista o installa una protezione antivirus aggiuntiva.
Come disattivo permanentemente Antimalware Service Executable?
https://www.youtube.com/watch?v=apZotfuo0uk
1. Ottieni il software AdvancedRun
 NOTE: Questa non è una soluzione, è un software prerequisite necessario per completare la maggior parte delle soluzioni, quindi assicurati di averlo scaricato e avviato quando le istruzioni ti dicono di eseguirlo.
- Visita la pagina di download di Advanced Run.
- Scarica il software.
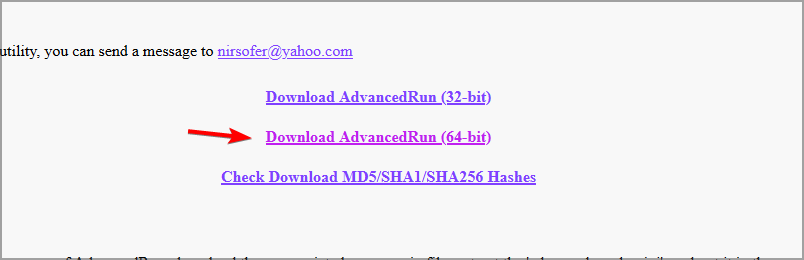
- Una volta scaricato, estrai il software in una directory per un accesso rapido e semplice.
Quando la soluzione richiede di utilizzare Advanced Run, sempre fai quanto segue:
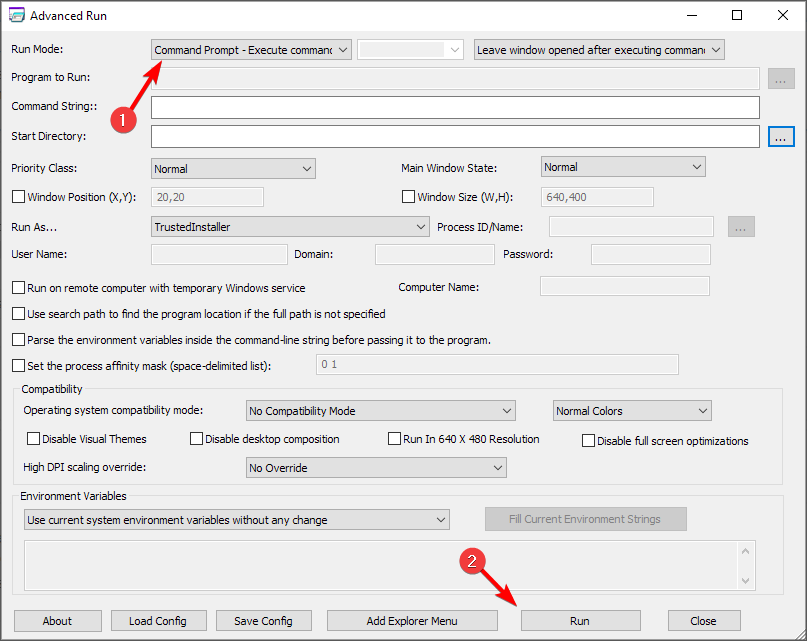
- Avvia il software Advanced Run facendo doppio clic su di esso.
- Fondamentale: Imposta sempre Esegui come su TrustedInstaller.
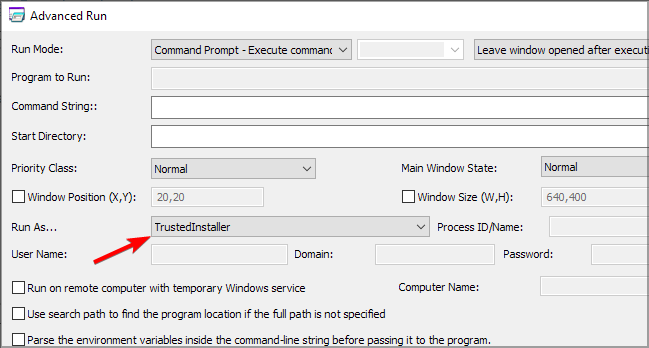
- Segui ulteriori istruzioni dalla soluzione.
2. Aggiungi eccezioni in Windows Defender
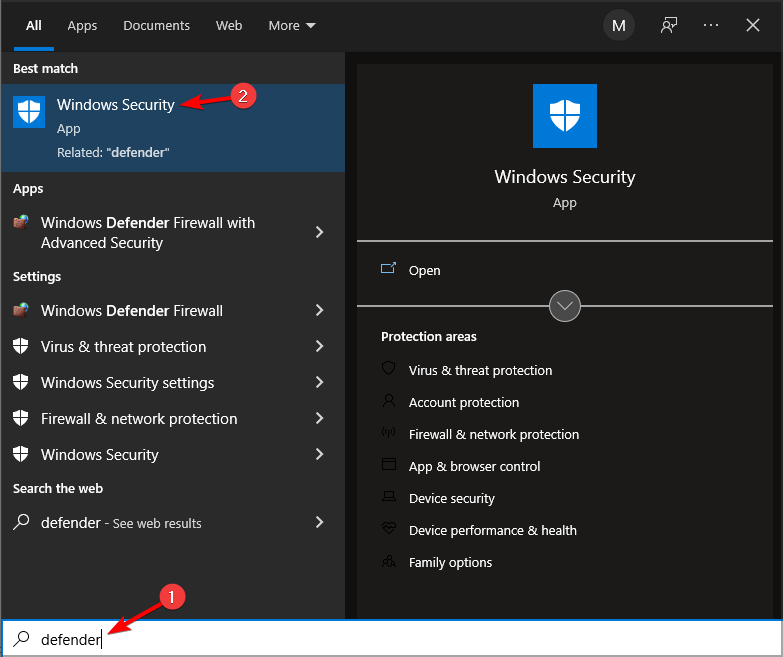
- Premi il tasto Windows + S e scrivi difensore. Seleziona Windows Defender dall’elenco dei risultati.
-
Fai clic su Protezione da virus e minacce. Poi fai clic su Gestisci impostazioni.
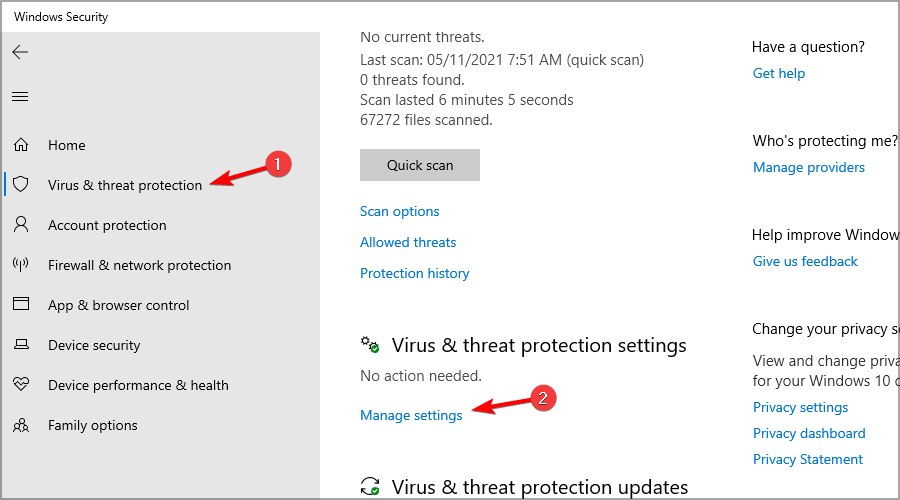
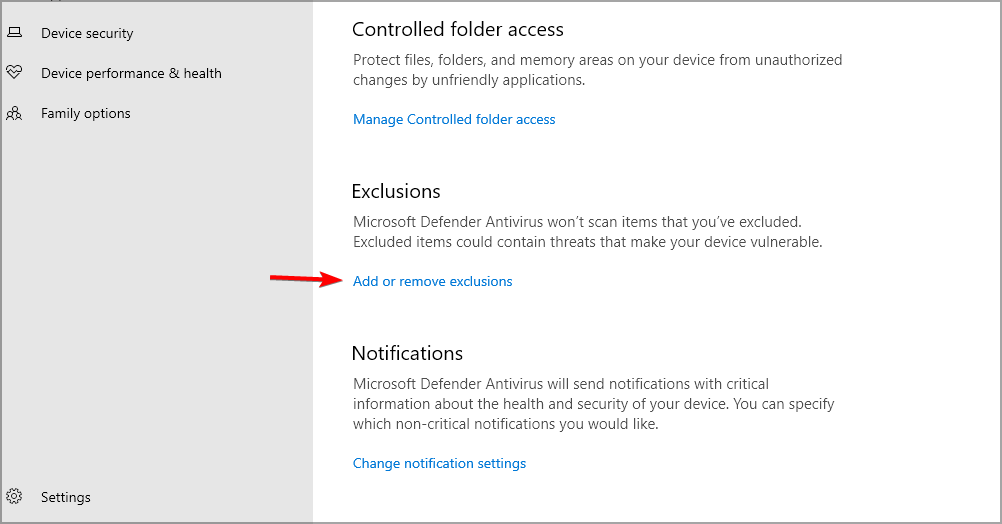
- Clicca su Aggiungi o rimuovi esclusioni nella sezione Esclusione.
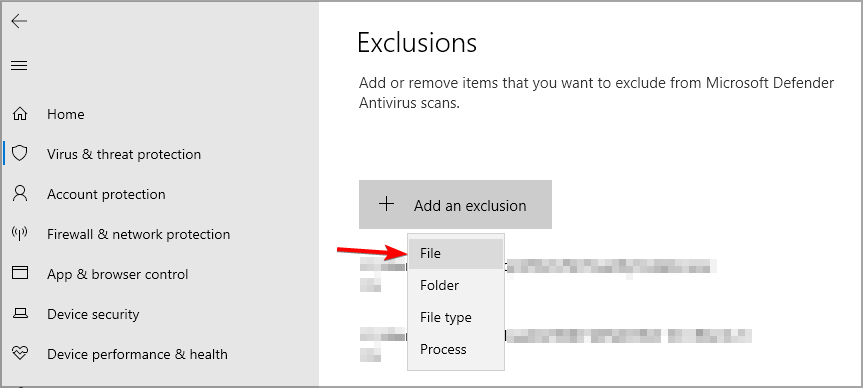
- Fai clic sul pulsante Aggiungi un’esclusione e seleziona File.
-
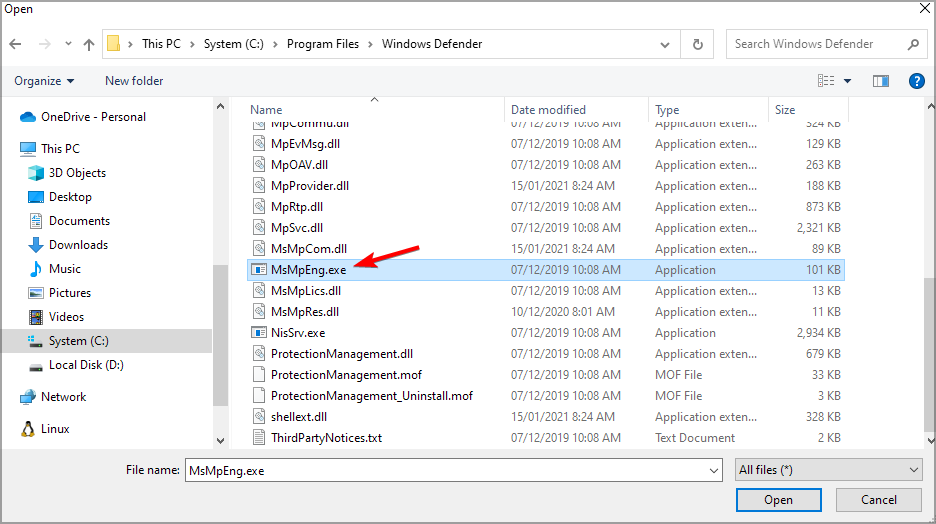
Vai alla seguente directory e seleziona MsMpEnd.exe nella seguente directory:
C:Program FilesWindows Defender
3. Crea uno script batch
NOTE: Questa soluzione apporterà modifiche al sistema del tuo PC. Esegui il backup dei tuoi file e crea un punto di ripristino del sistema. Non ci assumiamo alcuna responsabilità per eventuali danni che potrebbero verificarsi dopo aver utilizzato questa soluzione.
- Apri Blocco note.
- Incolla il seguente codice ora:
** @echo off ::Windows Defender reg add “HKLMSYSTEMControlSet001ServicesMsSecFlt” /v “Start” /t REG_DWORD /d “4” /f reg add “HKLMSYSTEMControlSet001ServicesSecurityHealthService” /v “Start” /t REG_DWORD /d “4” /f reg add “HKLMSYSTEMControlSet001ServicesSense” /v “Start” /t REG_DWORD /d “4” /f reg add “HKLMSYSTEMControlSet001ServicesWdBoot” /v “Start” /t REG_DWORD /d “4” /f reg add “HKLMSYSTEMControlSet001ServicesWdFilter” /v “Start” /t REG_DWORD /d “4” /f reg add “HKLMSYSTEMControlSet001ServicesWdNisDrv” /v “Start” /t REG_DWORD /d “4” /f reg add “HKLMSYSTEMControlSet001ServicesWdNisSvc” /v “Start” /t REG_DWORD /d “4” /f reg add “HKLMSYSTEMControlSet001ServicesWinDefend” /v “Start” /t REG_DWORD /d “4” /f ::WindowsSystemTray reg delete “HKLMSOFTWAREMicrosoftWindowsCurrentVersionRun” /v “SecurityHealth” /f :: SystemGuard reg add “HKLMSYSTEMControlSet001ServicesSgrmAgent” /v “Start” /t REG_DWORD /d “4” /f reg add “HKLMSYSTEMControlSet001ServicesSgrmBroker” /v “Start” /t REG_DWORD /d “4” /f ::WebThreatDefSvc reg add “HKLMSYSTEMControlSet001Serviceswebthreatdefsvc” /v “Start” /t REG_DWORD /d “4” /f reg add “HKLMSYSTEMControlSet001Serviceswebthreatdefusersvc” /v “Start” /t REG_DWORD /d “4” /f for /f %%i in (‘reg query “HKLMSYSTEMControlSet001Services” /s /k “webthreatdefusersvc” /f 2^>nul ^| find /i “webthreatdefusersvc” ‘) do ( reg add “%%i” /v “Start” /t REG_DWORD /d “4” /f ) :: reg add “HKLMSOFTWAREMicrosoftWindows NTCurrentVersionImage File Execution Optionssmartscreen.exe” /v “Debugger” /t REG_SZ /d “%%windir%%System32taskkill.exe” /f reg add “HKCUSoftwareMicrosoftWindowsCurrentVersionPoliciesAssociations” /v “DefaultFileTypeRisk” /t REG_DWORD /d “1808” /f reg add “HKCUSoftwareMicrosoftWindowsCurrentVersionPoliciesAttachments” /v “SaveZoneInformation” /t REG_DWORD /d “1” /f reg add “HKCUSoftwareMicrosoftWindowsCurrentVersionPoliciesAssociations” /v “LowRiskFileTypes” /t REG_SZ /d “.avi;.bat;.com;.cmd;.exe;.htm;.html;.lnk;.mpg;.mpeg;.mov;.mp3;.msi;.m3u;.rar;.reg;.txt;.vbs;.wav;.zip;” /f reg add “HKCUSoftwareMicrosoftWindowsCurrentVersionPoliciesAssociations” /v “ModRiskFileTypes” /t REG_SZ /d “.bat;.exe;.reg;.vbs;.chm;.msi;.js;.cmd” /f reg add “HKLMSoftwarePoliciesMicrosoftWindows DefenderSmartScreen” /v “ConfigureAppInstallControlEnabled” /t REG_DWORD /d “0” /f reg add “HKLMSoftwarePoliciesMicrosoftWindows DefenderSmartScreen” /v “ConfigureAppInstallControl” /t REG_DWORD /d “0” /f reg add “HKLMSoftwarePoliciesMicrosoftWindows DefenderSmartScreen” /v “EnableSmartScreen” /t REG_DWORD /d “0” /f reg add “HKCUSoftwarePoliciesMicrosoftMicrosoftEdgePhishingFilter” /v “EnabledV9” /t REG_DWORD /d “0” /f reg add “HKLMSoftwarePoliciesMicrosoftMicrosoftEdgePhishingFilter” /v “EnabledV9” /t REG_DWORD /d “0” /f goto :EOF
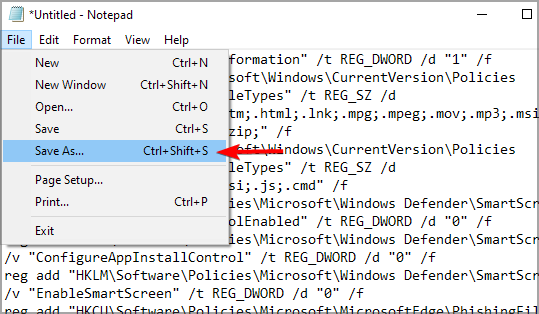
- Fai clic su File e seleziona Salva come.

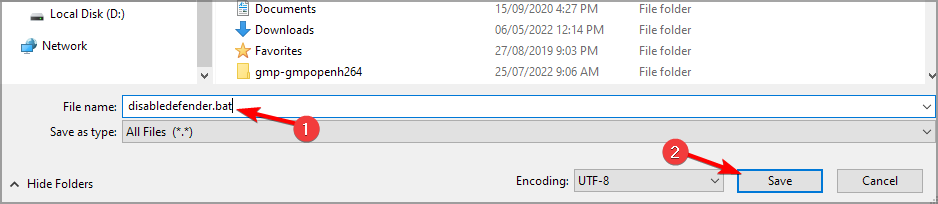
- Scegli una posizione di salvataggio. Imposta Salva come tipo su Tutti i file. Inserisci il nome del file come disabledefender.bat e salvalo.
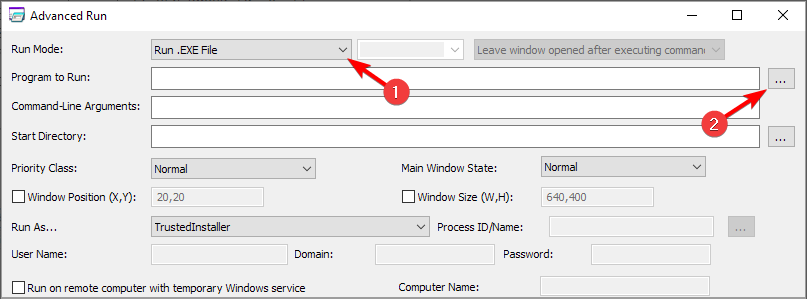
- Avvia Advanced Run e configurarlo per eseguire il file come TrustedInstaller.
- Imposta Modalità di esecuzione su Esegui .EXE file. Fai clic sui tre punti accanto al campo Programma da eseguire.
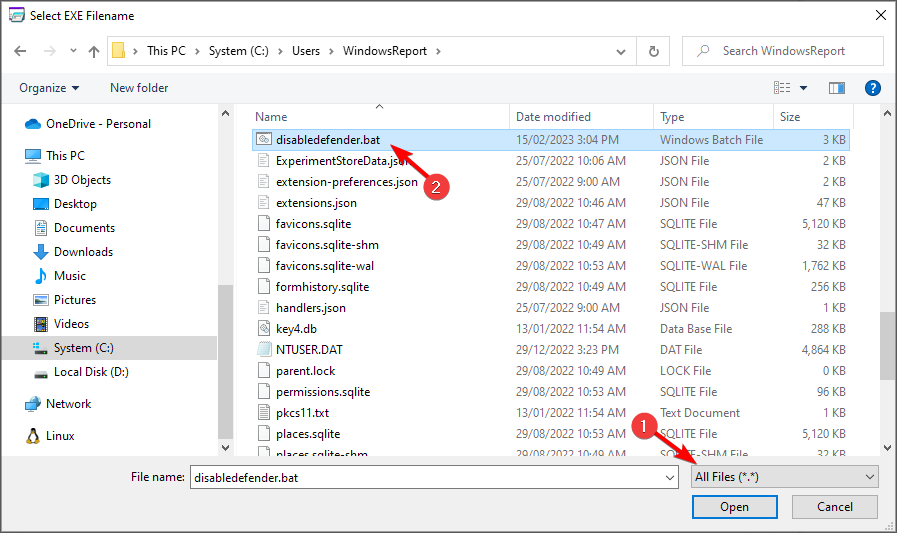
- Seleziona Tutti i file e scegli il file disabledefender.bat che hai appena creato.
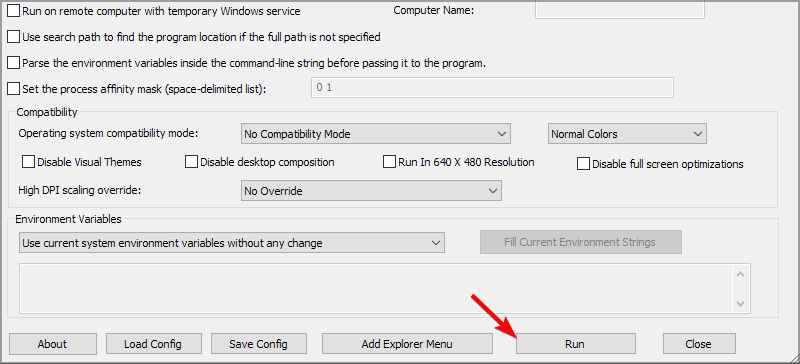
- Fai clic sul pulsante Esegui e attendi che il processo termini.
Puoi ripristinare Windows Defender creando un nuovo script come questo:
- Avvia Blocco note e incolla il seguente codice:
@echo off ::Windows Defender reg add “HKLMSYSTEMControlSet001ServicesMsSecFlt” /v “Start” /t REG_DWORD /d “0” /f reg add “HKLMSYSTEMControlSet001ServicesSecurityHealthService” /v “Start” /t REG_DWORD /d “3” /f reg add “HKLMSYSTEMControlSet001ServicesSense” /v “Start” /t REG_DWORD /d “3” /f reg add “HKLMSYSTEMControlSet001ServicesWdBoot” /v “Start” /t REG_DWORD /d “0” /f reg add “HKLMSYSTEMControlSet001ServicesWdFilter” /v “Start” /t REG_DWORD /d “0” /f reg add “HKLMSYSTEMControlSet001ServicesWdNisDrv” /v “Start” /t REG_DWORD /d “3” /f reg add “HKLMSYSTEMControlSet001ServicesWdNisSvc” /v “Start” /t REG_DWORD /d “3” /f reg add “HKLMSYSTEMControlSet001ServicesWinDefend” /v “Start” /t REG_DWORD /d “2” /f ::WindowsSystemTray reg add “HKLMSOFTWAREMicrosoftWindowsCurrentVersionRun” /v “SecurityHealth” /t REG_EXPAND_SZ /d “%systemroot%system32SecurityHealthSystray.exe” /f :: SystemGuard reg add “HKLMSYSTEMControlSet001ServicesSgrmAgent” /v “Start” /t REG_DWORD /d “0” /f reg add “HKLMSYSTEMControlSet001ServicesSgrmBroker” /v “Start” /t REG_DWORD /d “2” /f ::WebThreatDefSvc reg add “HKLMSYSTEMControlSet001Serviceswebthreatdefsvc” /v “Start” /t REG_DWORD /d “3” /f reg add “HKLMSYSTEMControlSet001Serviceswebthreatdefusersvc” /v “Start” /t REG_DWORD /d “2” /f for /f %%i in (‘reg query “HKLMSYSTEMControlSet001Services” /s /k “webthreatdefusersvc” /f 2^>nul ^| find /i “webthreatdefusersvc” ‘) do ( reg add “%%i” /v “Start” /t REG_DWORD /d “2” /f ) :: reg delete “HKLMSoftwareMicrosoftWindows NTCurrentVersionImage File Execution Optionssmartscreen.exe” /f reg delete “HKCUSoftwareMicrosoftWindowsCurrentVersionPoliciesAssociations” /f reg delete “HKLMSoftwarePoliciesMicrosoftWindows DefenderSmartScreen” /f reg delete “HKLMSoftwarePoliciesMicrosoftWindows DefenderSignature Updates” /f goto :EOF
- Fai clic su File e seleziona Salva come.
- Imposta Salva come tipo su Tutti i file. Dai al file il nome restoredefender.bat e salvalo.
- Avvia Advanced Run e esegui restoredefender.bat come TrustedInstaller.
4. Utilizza lo script di GitHub
NOTE: Eseguire qualsiasi script batch comporta rischi per la sicurezza, e non ci assumiamo responsabilità per eventuali danni potenziali. Ti consigliamo di creare un backup prima di procedere.
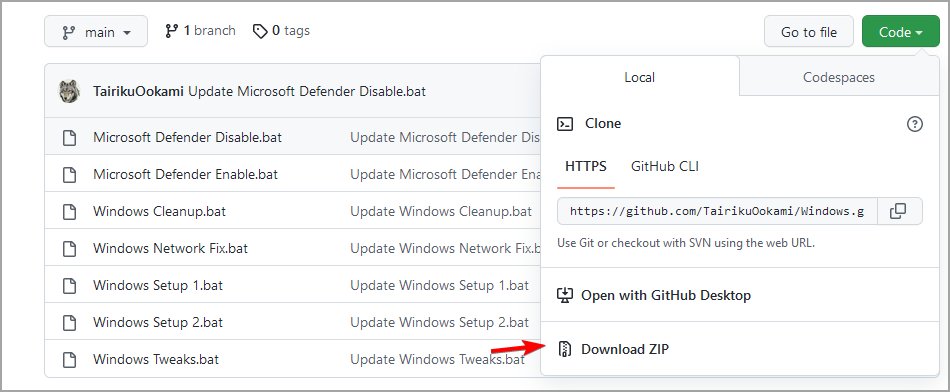
- Visita la pagina GitHub di Tairiku.
- Fai clic su Codice e seleziona Scarica ZIP.
- Una volta scaricato il file, estrailo in un luogo che puoi accedere rapidamente.
- Avvia quindi Advanced Run e assicurati di eseguirlo come TrustedInstaller.
- Imposta Modalità di esecuzione su Esegui .EXE file e fai clic sui tre punti accanto al campo Programma da eseguire.

- Seleziona Tutti i file e scegli il file Microsoft Defender Disable.bat che hai scaricato.
- Infine, fai clic sul pulsante Esegui per eseguire lo script.

Per ripristinare le modifiche, ripeti i passaggi, ma utilizza invece lo script Microsoft Defender Enable.bat.
5. Usa il prompt dei comandi
- Avvia Advanced Run e impostalo per eseguire come TrustedInstaller.
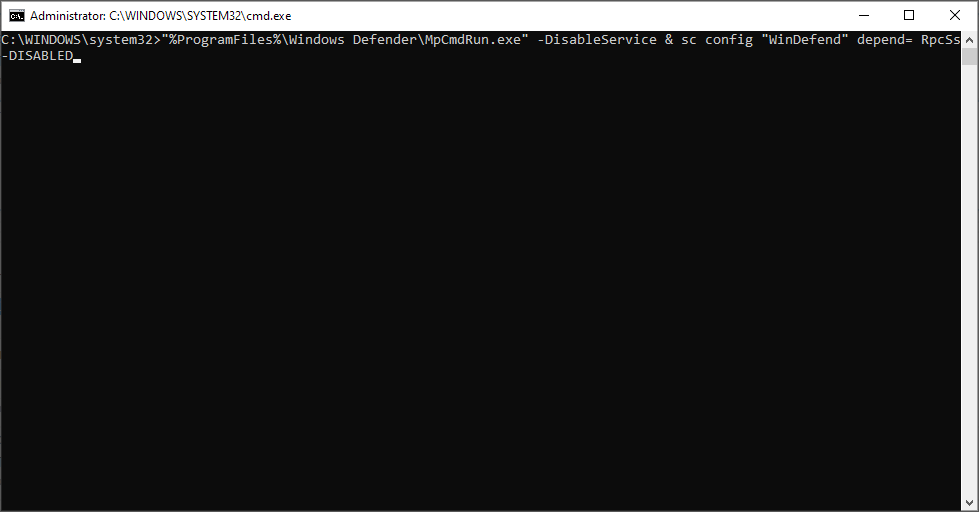
- Imposta modalità di esecuzione su prompt dei comandi e fai clic su Esegui.
-
Esegui il seguente comando:
"%ProgramFiles%Windows DefenderMpCmdRun.exe" -DisableService & sc config "WinDefend" depend= RpcSs-DISABLED
- Riavvia il PC.
- Facoltativo: Per ripristinare le modifiche, utilizza questo comando:
sc config "WinDefend" depend= RpcSs & "%ProgramFiles%Windows DefenderMpCmdRun.exe" -EnableService
Se i comandi precedenti non funzionano, utilizza invece questi comandi:
-
Per disattivare Windows Defender:
REG ADD "HKEY_LOCAL_MACHINESYSTEMCurrentControlSetServicesWinDefend" /v "DependOnService" /t REG_MULTI_SZ /d "RpcSs-DISABLED" /f -
Per attivare Windows Defender:
REG ADD "HKEY_LOCAL_MACHINESYSTEMCurrentControlSetServicesWinDefend" /v "DependOnService" /t REG_MULTI_SZ /d "RpcSs" /f**
6. Installa un antivirus di terze parti
Antimalware Service Executable è un processo strettamente collegato a Microsoft Defender.
Tuttavia, Microsoft Defender non verrà eseguito insieme a un antivirus di terze parti, quindi se hai problemi con Antimalware Service Executable, potrebbe essere utile installare un antivirus di terze parti.
Dopo aver risolto il problema con il processo di Defender, puoi utilizzare tranquillamente il software antivirus ESET per fornire una protezione avanzata contro gli attacchi online. Non solo, questo prezioso strumento viene fornito con il miglior utilizzo delle risorse.
Puoi anche proteggere il tuo PC Windows da nuovo malware, attacchi ransomware o minacce relative alla finanza mentre esegui attività sensibili come operazioni bancarie.
Dopo aver installato un antivirus di terze parti, Microsoft Defender si disattiverà automaticamente e il tuo problema dovrebbe essere risolto.
Speriamo che le nostre soluzioni ti abbiano aiutato a imparare come fermare Antimalware Service Executable e risolvere definitivamente questo problema.
La disattivazione di questo servizio è uno dei passaggi necessari per risolvere il problema dell’impossibilità di disattivare la protezione in tempo reale su Windows 11.
Anche se disattivi Antimalware Service Executable, non lasciare il sistema senza protezione. Puoi utilizzare qualsiasi opzione di software antivirus dalla migliore lista di antivirus con una licenza illimitata.
Prima di andare, non perdere la nostra guida su Msmpeng.exe utilizzo elevato della memoria poiché tratta un argomento simile.
Per ulteriori suggerimenti o domande, non esitare a lasciare commenti qui sotto e ci assicureremo di controllarli.